C开发环境的的搭建
如何选择开发环境
搭建C/C++开发环境有很多种方式,如:
MinGW + vscode(MinGW 是 GCC 的 Windows 版本,本地编译环境)
SSH 隧道连接 + vscode(远程 Linux 主机)
wsl + vscode(远程 Linux 环境)
CLion(Jetbrains开发的 C/C++ IDE,没错就是开发idea、Pycharm的那个捷克公司。自带MinGW环境)
visual studio(微软开发的 C/C++ IDE)
国内企业的真实研发环境一般为Linux环境,所以 这里建议 wsl + vscode, 或者 SSH 隧道连接 + vscode(远程 Linux 主机)。 我使用的是 wsl + vscode。这样更能够无缝迁移并适配国内企业的真实研发环境。
关于编译器的选择
C/C++的编译器目前有两个主流的软件:GCC 和 clang。有很多人说 clang 好, 有很多人说 GCC 好,也有人说二者各有千秋。那么在实际开发环境中该如何选择呢?
开发环境安装和配置
安装Linux操作系统
这里我们选择的是再win系统内安装wsl的方式。
安装gcc
进入windows命令行,键入wsl,进入Linux shell。
执行如下命令,把原来的 apt 源重命名为 sources.list.bak,将阿里云的源作为 apt 默认使用的源
mv -f /etc/apt/sources.list /etc/apt/sources.list.bak
cat > /etc/apt/sources.list<< EOF
deb http://mirrors.aliyun.com/ubuntu/ focal main restricted universe multiverse
deb http://mirrors.aliyun.com/ubuntu/ focal-security main restricted universe multiverse
deb http://mirrors.aliyun.com/ubuntu/ focal-updates main restricted universe multiverse
deb http://mirrors.aliyun.com/ubuntu/ focal-proposed main restricted universe multiverse
deb http://mirrors.aliyun.com/ubuntu/ focal-backports main restricted universe multiverse
deb-src http://mirrors.aliyun.com/ubuntu/ focal main restricted universe multiverse
deb-src http://mirrors.aliyun.com/ubuntu/ focal-security main restricted universe multiverse
deb-src http://mirrors.aliyun.com/ubuntu/ focal-updates main restricted universe multiverse
deb-src http://mirrors.aliyun.com/ubuntu/ focal-proposed main restricted universe multiverse
deb-src http://mirrors.aliyun.com/ubuntu/ focal-backports main restricted universe multiverse
EOF
然后
sudo apt-get update,更新apt 镜像信息。再然后
sudo apt-get install build-essential,一键安装 包括 gcc, g++, 和make。再安装手册页(关于如何使用 GNU/Linux 进行开发)
sudo apt-get install manpages-dev。验证 GCC 编译器的安装是否成功,使用
gcc --version命令。打印 GCC 版本。
gcc (Ubuntu 9.4.0-1ubuntu1~20.04.3) 9.4.0
Copyright (C) 2019 Free Software Foundation, Inc.
This is free software; see the source for copying conditions.  There is NO
warranty; not even for MERCHANTABILITY or FITNESS FOR A PARTICULAR PURPOSE.
安装gdb:
sudo apt-get install gdb。
在vscode上搭建远程开发环境
首先就是下载宇宙最强编辑器 vscode。 然后安装各种插件,首当其冲就是 wsl, 安装好之后在左侧导航栏有个远程连接图标,点击它就能连接到ubuntu环境了。
Note
这里默认是在外网情况下,如果你在内网,可能会下载vscode-server失败, 在网络无问题时,这个东西下载解压后会自动放到 .vscode-server/bin/{commitid}(vscode的commitid)目录下, 否则你要手动下载: https://update.code.visualstudio.com/commit:{commit_id}/server-linux-x64/stable. (注意把:${commit_id}替换成对应的Commit ID。然后根据提示更改相应文件的执行权限,直至成功即可。
安装cmake、c/c++、git 等相关插件
如图,这是我安装的插件。
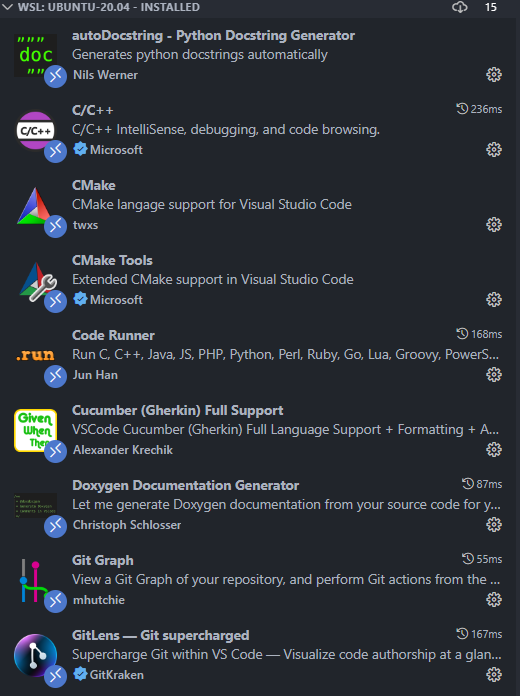
c/c++: c/c++ 代码代码高亮,提示,调试必备。
Doxygen: 快速给代码添加注释。
Git graph: git 提交图查看。
Gitlens: 可视化 git。
调试环境配置
在项目根目录的 .vscdoe 文件夹下下创建以下文件。
├── .vscode
│   ├── c_cpp_properties.json
│   ├── launch.json
│   ├── nisdk.code-workspace
│   ├── settings.json
│   └── tasks.json
具体配置如下:
c_cpp_properties.json
编译器路径和 IntelliSense 设置。 如果您想要对 C/C++ 扩展进行更多控制,可以创建一个 c_cpp_properties.json文件,该文件允许您更改编译器路径, 包含路径、C++ 标准(默认为 C++17)等设置。
{
    "configurations": [
        {
            "name": "Linux",
            "includePath": [
                "${workspaceFolder}/**",
            ],
            "defines": [],
            "compilerPath": "/usr/bin/gcc",
            "cStandard": "c17",
            "cppStandard": "gnu++14",
            "intelliSenseMode": "linux-gcc-x64"
        }
    ],
    "version": 4
}
launch.json 调试器设置
{
    // Use IntelliSense to learn about possible attributes.
    // Hover to view descriptions of existing attributes.
    // For more information, visit: https://go.microsoft.com/fwlink/?linkid=830387
    "version": "0.2.0",
    "configurations": [
        {
            "name": "gcc - Build and debug active file",
            "type": "cppdbg",
            "request": "launch",
            "program": "${workspaceFolder}/output/app.out",
            "args": [],
            "stopAtEntry": false,
            "cwd": "${fileDirname}",
            "environment": [],
            "externalConsole": false,
            "MIMode": "gdb",
            "miDebuggerPath": "/usr/bin/gdb",
            "setupCommands": [
                {
                    "description": "Enable pretty-printing for gdb",
                    "text": "-enable-pretty-printing",
                    "ignoreFailures": true
                }
            ],
            "preLaunchTask": "C/C++: gcc build active file",
            "miDebuggerArgs": "-q -ex quit; wait() { fg >/dev/null; }; /usr/bin/gdb -q --interpreter=mi",
        }
    ]
}
tasks.json 编译器构建设置
{
    "tasks": [
        {
            "type": "cppbuild",
            "label": "C/C++: gcc build active file",
            "command": "/usr/bin/gcc",
            "args": [
                "-g", // 使用-g选项编译,会包含完整的调试信息,包括变量名、函数名、行号等
                "${workspaceFolder}/*/*.c", // 编译工作目录下所有.c文件
                "-W",
                "all",
                "-I",
                "${workspaceFolder}/include", // -I选项,跟上一个路径,该路径告诉编译器在哪里搜索头文件
                "-o", // 用于指定生成的可执行文件的名称
                "${workspaceFolder}/output/app.out"
            ],
            "options": {
                "cwd": "${fileDirname}"
            },
            "problemMatcher": [
                "$gcc"
            ],
            "group": {
                "kind": "build",
                "isDefault": true
            },
            // 运行或调试文件时,系统会启动两个终端,一个是用于显示编译任务,另一个是
            //用于执行调试命令并显示程序运行结果。但是很多时候前一个终端没有显示的必要,
            //可以将其设置为只在编译失败时显示,如下:
            "presentation": {
                "echo": true,
                "reveal": "silent",
                "focus": false,
                "panel": "shared",
                "showReuseMessage": true,
                "clear": false
            },
            "detail": "Task generated by Debugger."
        }
    ],
    "version": "2.0.0"
}
settings.json 编译器的设置
{
    "C_Cpp.errorSquiggles": "enabled"
}
了解更多``vscode``编辑器的配置可参考:vscode文档